Information:
How to Download the Script
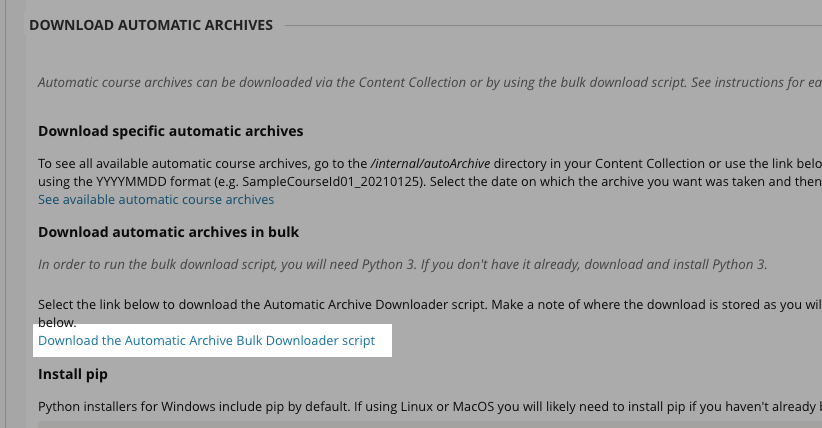
The latest version of the script is included with your Blackboard Learn application. To download the script go to System Admin → Course Settings → Automatic Archive Settings. The link "Download the Automatic Archive Bulk Downloader script" will always download the latest version.
How to Use the Script
The utility script is operated from the command line by calling the Python runtime executable followed by the script and several parameters. In some modes a feed file list is used.
You need to be in the directory into which you have saved the script. And you should've followed the instructions in the Related Links and Resources section to install the required packages and the virtual environment and pre-configure Learn to allow WebDAV to be used.
Invocation
The basic invocation follows. The characters "<", ">", "[" and "]" are CLI meta-syntax and should not be typed. See the synopsis for details.
python3 auto_archive_download.py [-h] -s <SITE> -u <USER> [ -f <FILE> | -b <YYYY>/<MM>/<DD> -e <YYYY>/<MM>/<DD> ] [-d] -o <OUTPUT>
Synopsis of Arguments| Option type | Short Form | Long Form | Description |
|---|
| Authorization | -s site | --site site | Front-end hostname of the site with protocol. EG: https://example.blackboard.com |
|---|
| -u user | --user user | User ID of the user to authorize with. The user must be a System Administrator.
Only "challenge/response" authentication such as LDAP and Default authentication are possible, CAS and SAML are not. The IETF RFC that governs WebDAV does not make any provision for "portal" based authentication.
If you have the default provider disabled you may need to create or use an alternative hostname. Contact Support for assistance. |
| Feed-File Mode | -f file | --file file | A feed-file containing a list of course ID.
This argument is required if the date mode is not used. |
|---|
| Date Mode | -b date | --begin date | Date in big-endian format YYYY/MM/DD, for example 2021/01/01
When date mode is used all courses created from the specified begin-date to the specified end-date date are downloaded. Both options are mandatory if date mode is used. Date mode uses the creation date of the course, not the creation date of the archive files.
If this is used in conjunction with the feed-file mode, then courses must meet both criteria. |
|---|
| -e date | --end date |
| Output | -o output | --output output | The output argument supports local paths and S3 paths.
S3 and Local Mode options| Local | Input any path for example the name of a folder. This can be an absolute path or a relative one. Follow the shell quoting rules of your operating system
Examples:
d:\archive
/mnt/ad0s1c/archive
archive
The folder should already exist. |
|---|
| S3 | Input a standard S3 bucket path like s3://mybucket/mypath/
In S3 mode the standard AWS environment variable are read automatically or a profile can be used. |
|---|
|
|---|
| Other | -h | | Print a help message |
|---|
| -d | | Print debug messages while operating |
Examples
When you run the script you'll need to change the directory to the path where the script is located. The below examples assume that you follow the setup instructions at the end of this document and that this path is the same path where the virtual environment folder is located and the virtual environment is named "
env." If you configured it differently you'll need to update the paths accordingly.
Downloading a Range of Course Archives by Date
The script has two basic modes of operation. They can be used together or apart. The first is
Date Mode: you specify a begin and end date and all the archives are then downloaded automatically for courses created between those dates. This can be useful for archiving terms.
This example is for Windows. The command interpreter prompt is shown in green light type, this is to indicate when the virtual environment becomes active. Don't type the prompt. Only type the portions in bold black type. In this example, we'll download courses created between January 1, 2021 and March 1, 2021
c:\> cd %userprofile%
c:\users\jsmith> .\env\scripts\activate
(env) c:\users\jsmith> py auto_archive_downloader.py -site example.blackboard.com -u administrator -b 2021/01/01 -e 2021/03/01 -o d:\bulkarchiveoutput
The script will prompt for a password and begin downloading. Here is what each line does:
- Change to the directory that the script, and the virtual environment folder are in. For the purposes of this example, that's the user's personal home folder.
- Activate the virtual environment.
- The virtual environment is now active and the script is executed. On Windows, the Python runtime executable is called 'py'
Example for Macintosh or UNIXThe shell prompt is shown in light green. This is to illustrate when the virtual environment becomes active.
Note that line 2 may be source ./env/scripts/activate in some configurations.
jsmith@localhost:/$ cd $HOME
jsmith@localhost:~$ source ./env/bin/activate
(env) jsmith@localhost:~$ python3 auto_archive_downloader.py -site example.blackboard.com -u administrator -b 2021/01/01 -e 2021/03/01 -o /mnt/ad1s0a/bulkarchiveoutput
If "python3" does not work see the note under "Installing and Configuring Python" below for Macintosh and Unix regarding the command "python" or "python3"
Downloading a specific list of courses
The other major mode of the utility is
feed-file mode. In this mode, the script takes an input list feed file and operate only on the specified courses.
Feed File Format
You need to create a plaintext file consisting of the course IDs. There should be one course per line, and no other information can be included. The new line is the delimiter, don't include a comma or tab.
For example:
eng101
com304
phy202
Use the "Course ID", don't use the PK1, course name or batch_uid ("External course key"). Use the full ID: a sub-string will not work.
Running the Script with a Feed-File
Now run the script. As with the previous example, don't type the Windows command interpreter prompt. Pass the feed-file path to the script with the
-f or
--file arguments.
c:\> cd %userprofile%
c:\users\jsmith> .\env\scripts\activate
(env) c:\users\jsmith> py auto_archive_downloader.py -site example.blackboard.com -u administrator -f myinputfile.txt -o d:\bulkarchiveoutput
Using S3 Buckets
The above examples show downloading the archives to a folder on a drive "d" attached to the local machine called "
bulkarchiveoutput." You can also use the script to
upload the archives to an S3 bucket. You'll need to create an S3 bucket and an access key with enough rights to upload files. These steps are not detailed in this manual. Please consult the Official AWS manuals or AWS support for details.
To use the S3 bucket, export the AWS Access Key ID and secret key as environment variables with the AWS standard names. Provide the bucket path in the standard S3 URI-notation as the output option instead of a local folder path. In the following examples the S3 path is
s3://mybucket/myfolder/
S3 Configuration on Windows
Use the
set command to set the variables
c:\> cd %userprofile%
c:\users\jsmith> .\env\scripts\activate
(env) c:\users\jsmith> set AWS_ACCESS_KEY_ID=XXXXXXXXXXXXXXXXXXXX
(env) c:\users\jsmith> set  AWS_SECRET_ACCESS_KEY= XXXXXXXXXXXXXXXXXXXXXXXXXXXXXXXXXXXXXXXX
(env) c:\users\jsmith> py auto_archive_downloader.py -site example.blackboard.com -u administrator -b 2021/01/ 01 -e 2021/03/01 -o s3://mybucket/myfolder/
The trailing slash at the end of the S3 path is very important. Don't omit it. It
Mac and Unix
If the shell is BASH, which is usually the case, use the command
export. For TCSH use
setenv (not shown)
and for other shells consult the manpage for the shell for instructions.
jsmith@localhost:/$ cd $HOME
jsmith@localhost:~$ source ./env/bin/activate
(env) jsmith@localhost:~$ export AWS_ACCESS_KEY_ID=XXXXXXXXXXXXXXXXXXXX
(env) jsmith@localhost:~$ export AWS_SECRET_ACCESS_KEY= XXXXXXXXXXXXXXXXXXXXXXXXXXXXXXXXXXXXXXXX
(env) jsmith@localhost:~$ python3 auto_archive_downloader.py -site example.blackboard.com -u administrator -b 2021/01/01 -e 2021/03/01 -o s3://mybucket/myfolder/
The trailing slash at the end of the S3 path is very important. Don't omit it.
Related Links and Resources:
System Requirements and Prerequisites
You will need the following software which is available for free for for popular operating systems like Windows, Mac and Unix/Linux:
- Python Version 3. Python 2 is not supported.
- PIP
- The following python packages:
For Unices, you may already have the Python runtime itself installed or it may be available via your package manager (APT, YUM, BSD ports etc). Python may also be downloaded from its website, https://www.python.org, in binary and source distributions.
Installing and Configuring Python
The installation and configuration of Python is not encompassed by the scope of Enterprise Learn Support. The following instructions are provided as a convenience only:
The Windows command interpreter or shell prompt is shown in green light type, this is to indicate when the virtual environment becomes active. Don't type the prompt. Only type the portions in bold black type.
Windows
- Download the appropriate Windows installer package from https://www.python.org. Python for Windows includes pip but it doesn't include "requests" or "boto" modules, so those will be set up below.
- Open a powershell or "cmd.exe" window.
- Configure a virtual environment by typing the following commands. This command will create a virtual environment called "env" in your personal directory (usually: c:\users\jsmith or similar). The third line creates the env virtual environment. Depending on your settings, your command prompt will usually change to show the name of the environment.
c:\> cd %userprofile%
c:\users\jsmith> py -m pip install --user virtualenv
c:\users\jsmith> py -m venv env
- Activate the virtual environment, and install the "requests" and "boto" packages into it.
c:\users\jsmith> .\env\scripts\activate
(env) c:\users\jsmith> pip install boto3 requests
Macintosh and Unix/Linux
Note about 'python' vs 'python3': depending on your OS configuration: you might need to type python3 or you might need to type python. It is required to use Python version 3, Python version 2 will not work. The question is simply under which name the interpreter is installed. If Python versions 2 and 3 are co-installed, or on some older versions of Linux and Unix you might need to explicitly type python3 to use the version 3 interpreter. However on some OS configurations, especially newer ones, Python version 2 is absent or depreciated and the name of the Python runtime interpreter is simply 'python'.
- Install Python 3 from python.org, or from your operating system package repositories. If PIP is included then skip to step 3
- If PIP is not included, install PIP:
jsmith@localhost:/$ python3 -m pip install --user --upgrade pip
- For Macintosh, or desktop Unix open a terminal emulator.
- Configure a virtual environment by typing the following commands. This command will create a virtual environment called "env" in your personal directory (usually: /home/jsmith, /usr/local/home/jsmith or similar). The third line creates the "env" virtual environment. Depending on your settings, your shell prompt will usually change to show the name of the environment. The following example is for the BASH shell:
jsmith@localhost:/$ cd $HOME
jsmith@localhost:~$ python3 -m pip install --user virtualenv
jsmith@localhost:~$ python3 -m venv env
- Activate the virtual environment, and install the "requests" and "boto" packages into it. Note that line 1 may be source ./env/scripts/activate in some configurations.
jsmith@localhost:~$ source ./env/bin/activate
(env) jsmith@localhost:~$ pip install boto3 requests
Other Operating Systems
This script has only been officially tested with Windows, Macintosh and Linux. It may be possible to use other Operating Systems. Most other OSes will be configured relatively similarly to Macintosh and Unix. Consult the manuals of the other OS for information on adapting the instructions.
Pre-configuration of Learn
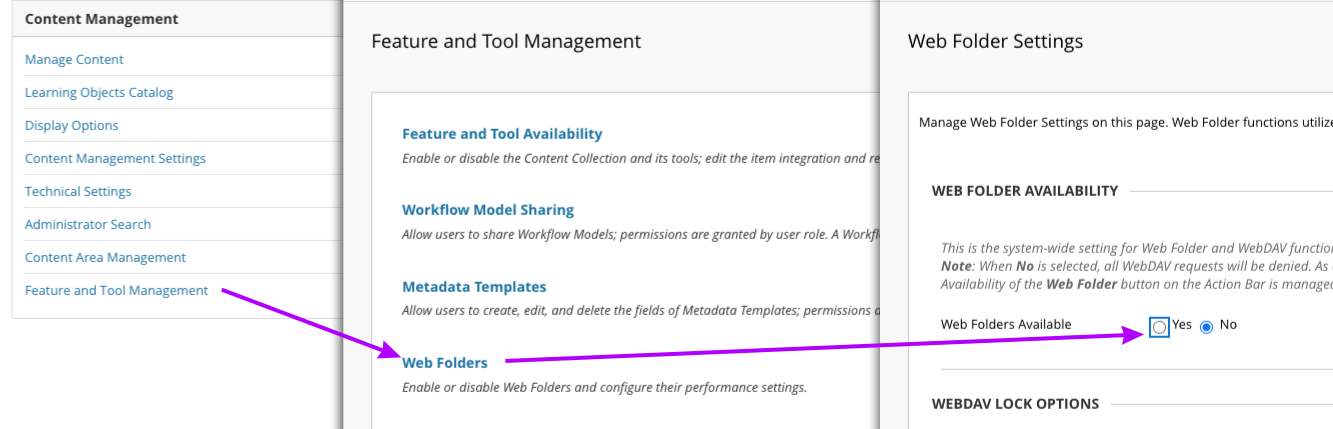
In order to use the script WebDAV must be enabled. WebDAV availability is controlled by the "Web Folder" setting.
To check or enable WebDAV availability
- Go to System Admin → Content Management module → Feature & Tool Management → Web Folders
- For "Web Folders Available" select the 🔘 Yes radio button
Frequently Asked Questions
There's several archive files for the courses. Which archive will the script select?
The script will select the latest available archive.
Can I run more than one instance of the script at a time?
It is not recommended to run multiple instances of the script concurrently. Archives can be large and performance issues are possible.
Where can I get help installing Python and/or with PIP and Python virtual environments?
Python lists help resources on its website: https://www.python.org/about/help/
An example is listed in Related Links and Resources but Enterprise client support can't assist with the installation or configuration of Python.
Can you do this process for me?
Blackboard Enterprise support is unable to operate this process for clients. Management of this data is a client process. For a charge, Consulting services may be available. To get started speak with your account manager.
Can I use this script with Self or Managed Hosting?
Currently: this script is only for SaaS hosting.
Can I download to Google Drive, OneDrive, or some other cloud service provider?
This is not currently an option. However you can download the files locally then re-upload them via the third-party vendor tools.
Does this script pipeline from Xythos to S3, or does it download and re-upload?
It downloads and re-uploads. It's not an S3 to S3 copy.
There was an error, and the script terminated. What should I do?
The script currently doesn't support retry or progress. If the script fails part way through, inspect the console output to find out where it errored out and address the root cause. Then, you'll need to update the feed file to reflect the new 'starting position,' and retry.
Access Denied errors occur with the S3 bucket, but the permissions appear correct
Check that the trailing slash is used after the folder. for instance s3://mybucket/myfolder/ instead of s3://mybucket/myfolder . The latter may not work.